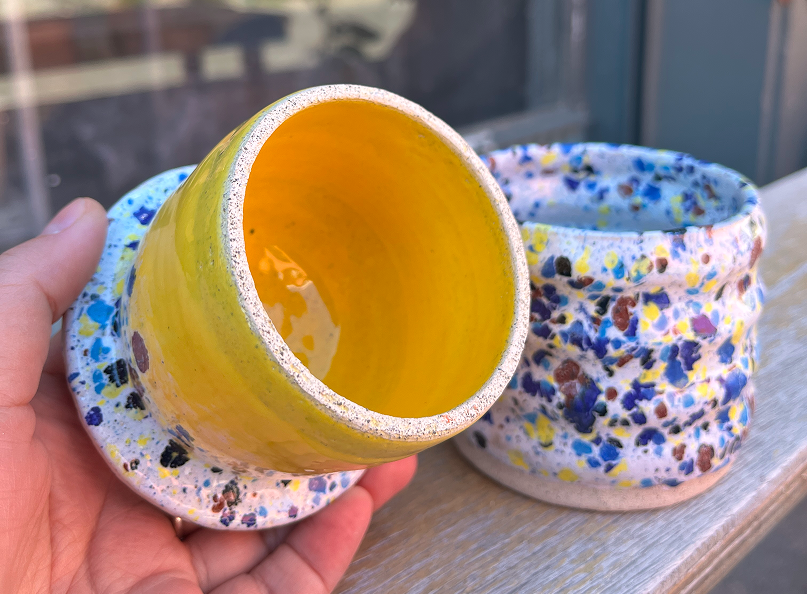
Wheel Throwing
Wheel throwing is the process of shaping clay on a rotating pottery wheel. Using your hands and a few essential tools, you guide the clay into symmetrical forms such as bowls, mugs, and vases. The constant motion of the wheel allows for precise control, helping you create smooth, even surfaces—making it a popular technique for crafting functional and refined pottery pieces. While it may look effortless when done by experienced potters, the process involves a series of precise and often challenging steps that require patience, coordination, and practice.
Throwing pottery involves a series of steps on the wheel. Whatever you’re making—whether it’s a cup, bowl, or vase—you need to center the clay first. This means getting the clay perfectly positioned in the middle of the wheel head so it spins smoothly and evenly.
If you’re throwing a tall form, like a mug, vase, or jug, the next step is opening up the clay, creating a hollow space in the middle—like a donut. Then comes the part that potters both dread and love: pulling up the walls. This is when you gradually coax the walls of your vessel upwards, increasing height while keeping the shape even. Once you’ve pulled the walls into a basic cylinder, the real fun begins—you get to shape the clay however you like.
There are other techniques involved in creating flat forms like plates and platters, which require a different approach to prevent warping and cracking.

How Does Wheel Throwing Work?
1. Centering the Clay
The process begins by placing a lump of clay directly in the middle of the wheel head. With steady hands and firm pressure, you work to center the clay—this step is essential for balance and symmetry.
✅ Why it's important: If the clay isn't perfectly centered, your piece will wobble and become uneven as you shape it.
⚠️ Why it's difficult: Clay resists your hands at first—especially when wet and heavy. Beginners often struggle to hold the clay steady without forcing it out of place or tiring their arms too quickly.
2. Opening Pulling Up
Next, you create an opening in the center of the clay, forming a hollow space. From there, you gradually pull the clay upwards to build the walls of your piece, controlling the thickness and height as you go. This step is often one of the trickiest to master—applying too much pressure can collapse the form, while too little won’t lift the walls at all. The clay needs to be evenly compressed and pulled at just the right speed and pressure, which takes time, coordination, and practice to develop. Even experienced potters still have pieces collapse now and then!
✅ The goal: To evenly distribute the clay and build height without thinning it too much.
⚠️ Why it's tricky: Clay responds to even the slightest difference in pressure. Too much force and your piece can collapse or tear; too little and the walls stay short and thick. Uneven pulls can cause wobbles, weak spots, or cracking. Mastering this stage requires a delicate touch, muscle memory, and many hours of practice.
3. Shaping and Refining
Once the basic form is established, you use your fingers and specialized tools to shape, smooth, and refine the design—whether it's a simple cylinder or a more complex silhouette.
✨ This is the creative phase where the personality of the piece starts to emerge.
4. Trimming the Bottom
After the piece dries to a leather-hard stage (firm but still slightly soft), it's flipped upside down on the wheel. Using trimming tools, the base is cleaned up, excess clay is removed, and a foot ring can be carved for a polished look.

5. Drying and Firing
Once fully dried, the piece is ready for its first kiln firing, called a bisque firing. This hardens the clay and prepares it for glazing. After glazing, it goes through a second glaze firing, resulting in a finished, durable ceramic piece.
Pros of Wheel Throwing:
✅ Creates smooth, symmetrical forms
✅ Faster than handbuilding for making multiple pieces
✅ Great for functional pottery like cups, plates, and bowls
✅ Satisfying and meditative process
✅ Once mastered, allows for quick production
Cons of Wheel Throwing:
❌ Requires a pottery wheel, which can be expensive (but you can also find cheaper options on Amazon to start with)
❌ Steep learning curve – takes time and practice to master (A LOT OF TIME)
❌ Can be messy and requires more cleanup
❌ Limited to round forms (without extra techniques like altering or assembling)
My Journey with Wheel Throwing
Even though I began my pottery journey with handbuilding, I always knew that wheel throwing was where my heart truly belonged. I couldn’t wait to get my hands on a wheel and start learning the craft. Once I did, there was no turning back. It was messy, frustrating, and for months, I couldn’t manage to make a proper vessel—but I loved every moment of it.
Wheel throwing challenged me in ways handbuilding never did. It pushed my patience, coordination, and determination. I spent countless hours practicing, failing, and trying again. Slowly but surely, things began to click. The effort I poured into learning paid off, and now, I genuinely enjoy working on the wheel. It’s become one of my favorite parts of the ceramic process.
Recently, I took a big step and bought myself a new wheel! It's SHIMPO RK-55. I’m super proud of this little milestone, and every time I sit down at the wheel, I’m reminded of how far I’ve come and how much more there is to explore.

Handbuilding
Handbuilding is a pottery technique where you shape clay without using a wheel. Instead, you use your hands, simple tools, and techniques like pinching, coiling, and slab building. This method has been used for thousands of years and allows for more organic, freeform designs.

1. Pinching
The most intuitive and beginner-friendly method, pinching involves taking a ball of clay and pressing it between your fingers and thumb to shape it into a small vessel.
✅ Great for: Cups, bowls, small planters, and learning clay’s behavior.
✨ Why it’s special: Pinch pots often retain a beautiful, handmade feel that showcases the maker's touch.
2. Coiling
Coiling involves rolling out long, rope-like coils of clay, stacking them one on top of another, and smoothing them together to build height and structure.
✅ Great for: Tall vases, asymmetrical pieces, and freeform shapes.
✨ Why it’s powerful: Coiling gives you control over the size, shape, and movement of your piece—it’s like drawing in 3D.
3. Slab Building
In slab building, you roll out flat sheets of clay (like dough), cut them into shapes, and then assemble them by scoring and slipping the edges together.
✅ Great for: Boxes, plates, tiles, and geometric forms.
✨ Why it’s versatile: Slab building is ideal for more structured or architectural pieces, and it opens up a lot of room for clean lines and flat surfaces.
4. Texturing and Detailing
There are aslo numerous handbuilding technics that are used for decoration:you can create textures, carvings, cutouts, use stamps, and layered designs. You can press found objects (like lace or leaves) into the clay, carve illustrations, or even attach sculptural elements to make your pieces truly one-of-a-kind.
All in all this method really encourages freedom, intuition, and artistic expression, making it perfect for creating organic, sculptural, or textured pieces.

Pros of Handbuilding:
✅ No need for a wheel – accessible for beginners
✅ Allows for unique, organic, and sculptural shapes
✅ Great for artistic, textured, and decorative pieces
✅ More control over the design and details
✅ Encourages creative exploration and experimentation
✅ Ideal for larger or unconventional shapes
Cons of Handbuilding:
❌ Takes longer to create symmetrical pieces
❌ Can be more challenging to make identical items
❌ Requires patience and careful construction to avoid cracks or structural weaknesses
My Journey with Handbuilding
Even though I’m currently obsessed with wheel throwing, my pottery journey began with handbuilding—and I’m so glad it did.
Before ever touching the wheel, I spent time learning and practicing all the foundational handbuilding techniques: pinching, coiling, slab building, scoring and slipping, and texturing. This phase not only helped me understand how clay behaves, but also gave me the freedom to experiment, mess up, and create beautiful, imperfect pieces by hand.
Getting familiar with clay through handbuilding gave me a solid foundation and made the transition to the wheel so much smoother. I already understood how to handle moisture, thickness, and form—and that confidence really paid off when the wheel started spinning.
Even now, I still handbuild regularly. Whether I’m sculpting, attaching a handle to a mug, or adding tiny decorative details to a thrown piece, that handbuilding knowledge comes in handy every single day. I love combining techniques to create pieces that are both functional and artistic—blending smooth wheel-thrown forms with sculptural or textured handbuilt elements.
Which Pottery Technique Should You Choose?
Both wheel throwing and handbuilding offer unique strengths—and the best choice really depends on your creative goals, personality, and what kind of pieces you want to make.
🌀 Choose Wheel Throwing If:
- You love precision, symmetry, and working quickly.
- You want to create functional pottery like mugs, bowls, plates, and vases.
- You enjoy the rhythm of repetition and eventually want to produce matching sets.
Wheel throwing is ideal if you’re drawn to clean forms and enjoy working with a fast-paced, centered energy. Once you master the basics, it becomes a deeply meditative and satisfying process.
✋ Choose Handbuilding If:
- You enjoy slower, more sculptural processes.
- You want to explore organic, expressive shapes or more artistic, textured forms.
- You love using your hands and simple tools to shape clay intuitively.
Handbuilding gives you full creative control and allows you to infuse each piece with personality. It’s perfect for one-of-a-kind pieces, whimsical designs, and learning the language of clay.
Why Not Try Both?
Here’s the best part: you don’t have to choose just one.
Many potters (myself included!) combine both techniques to create truly unique pieces. For example, you can throw a basic form on the wheel and then:
- Sculpt a handbuilt handle or spout,
- Add carved or textured details,
- Attach sculptural elements or experiment with slab-built additions.
Combining handbuilding and wheel throwing gives you the best of both worlds—structure and freedom, form and expression. It opens up endless creative possibilities.
So, whether you're a beginner looking to get started or an experienced potter exploring new techniques, don’t be afraid to mix and match. The clay doesn't mind—and your creativity will thank you.
Join our Pottery Workshop and Try It Yourself!
The best way to truly understand these techniques is to experience them hands-on. Whether you're interested in trying wheel throwing, handbuilding, or both, we offer workshops for beginners and enthusiasts alike.
Come join us at our home pottery studio in Larnaca and discover the joy of working with clay!


.png)

.png)